Motor Mounts - LS1 FC RX7
Scope: This page explains the process I went through to build my LS1 motor mounts. Drawings and pictures are included. This is NOT an exact tutorial. You will have to place the motor take measurements and make adjustments. This will however, give you a good start and show you how difficult (or easy) the process is.
Materials:
1/4" plate
3”x1.5” - 1/8" Wall Square Tubing
1.5” round stock (for bushings)
First:
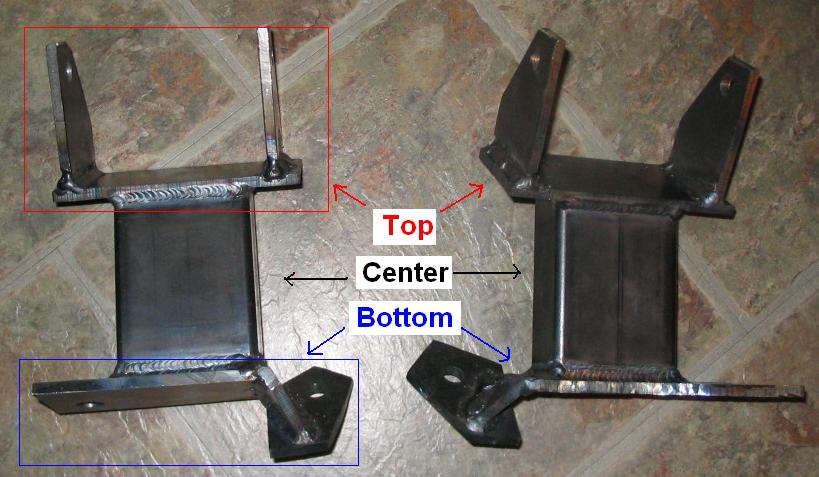
It is easiest to split the mounts into three sections:
1. Top – This is the part that bolts to the LS1 mounts.
2. Center – Connects the top and bottom pieces.
3. Bottom - Bolts to the stock RX7 sub-frame in two spots per side. Once where
the rotary mounts were and once to existing holes toward the front of the subframe.
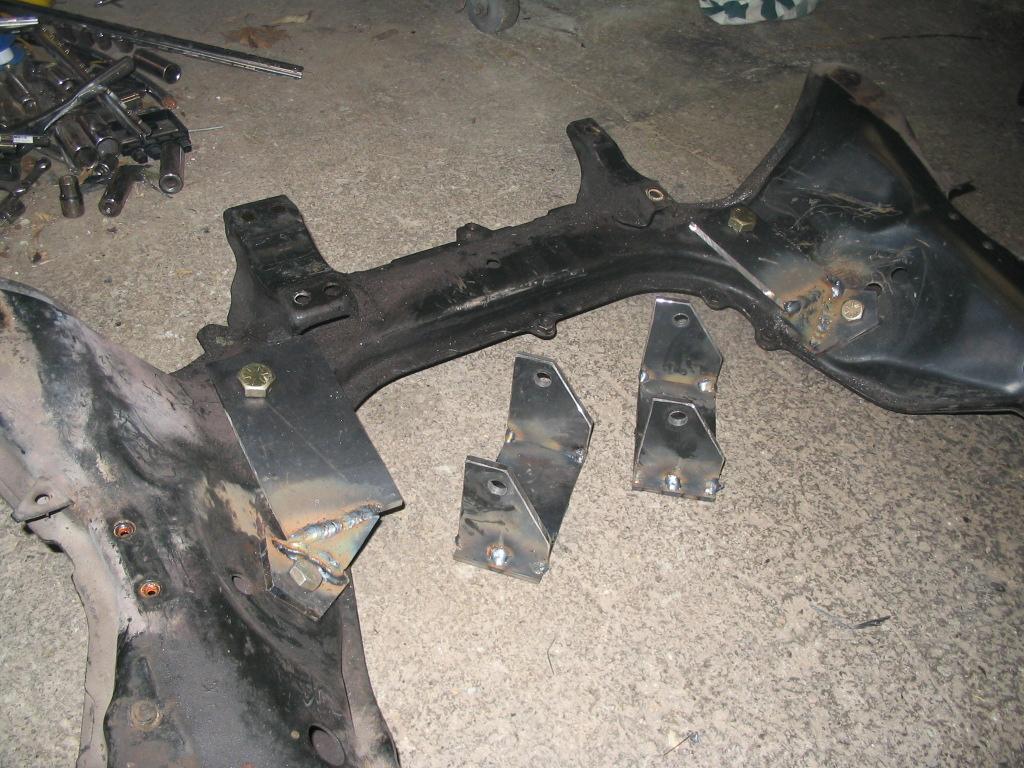
This picture shows how the mounts bolt to the sub-frame. Note that the front bolt locations require bushings.

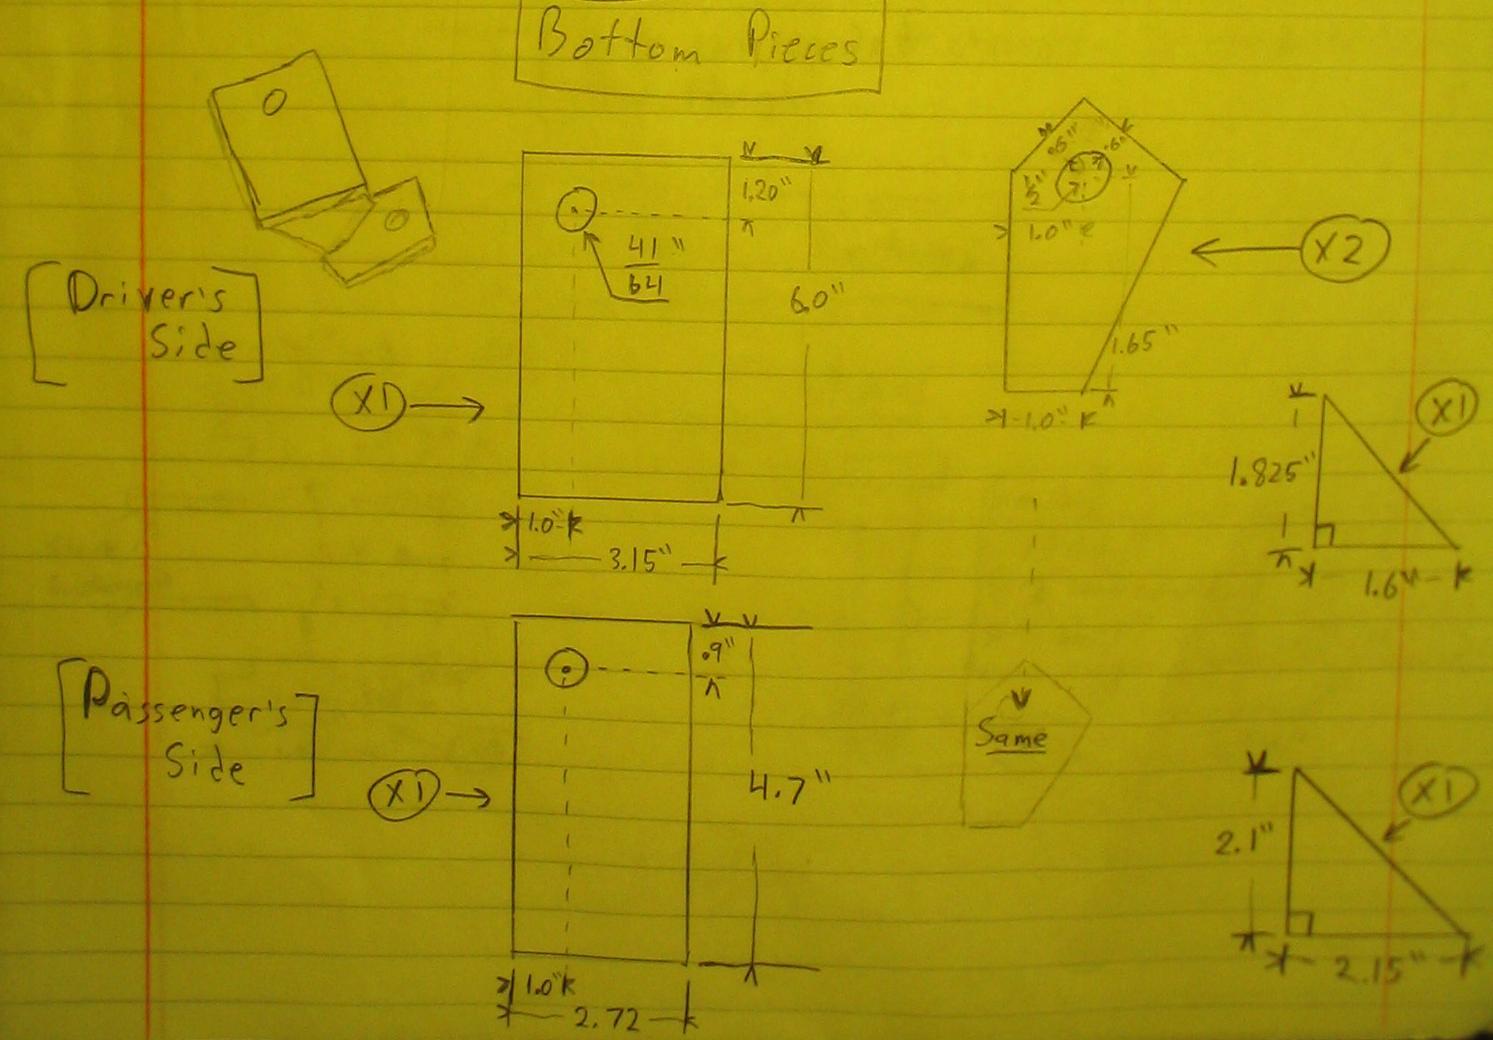
Drawings:
These are the dimensions I have recorded. There
was some unrecorded trimming that took place during the build process so these
may not be exact (pretty close though).


Steps and Iterations:
1. Build the top and bottom pieces and make the bushings.
2. Bolt the top pieces to the LS1 and the bottom pieces to the sub-frame.
3. Position the motor where you want it. That is, as far back as possible and
just off the power steering rack. You should have the transmission on the motor
when you do this! Otherwise the pitch of the motor will be screwed up. Support
the transmission with a jack.
4. Check the drive-shaft alignment (you don’t need a drive shaft to do
it). Generally, all you need to do is align the bottom of the transmission mount
with the floor pan (as allotted by the typical transmission member architecture).
Check the transmission alignment page
for a moor accurate method.
5 . Take the measurements for the center post.
6 . Cut a piece of wood (2x4) to the dimensions measured above, test fit, and
make adjustments if necessary.
7 . Once you have satisfactory dimensions cut the 3”x1.5” square
tube, test fit, and make adjustments if necessary.
8. Tack the center pieces to the top pieces. You should now be able to set all
the weight of the engine on the mounts. This is important because the motor
mounts will give a little under the weight.

9. If everything looks good, finish tacking them together, remove’em,
weld’em, and paint’em!


Created by EyeOutThere